
''Love grows better in little houses'' Doug Stone
Welcome to Pin

Friday 27 December 2013
Saturday 16 November 2013
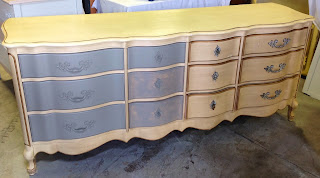
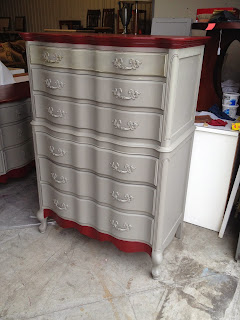
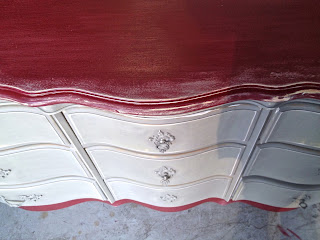
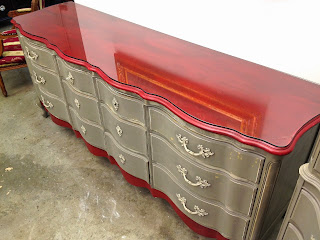
Painting furniture with cherry and slate colors!
Hello Everyone!
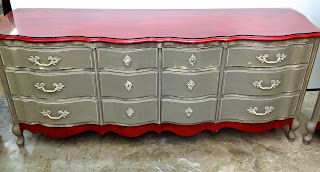
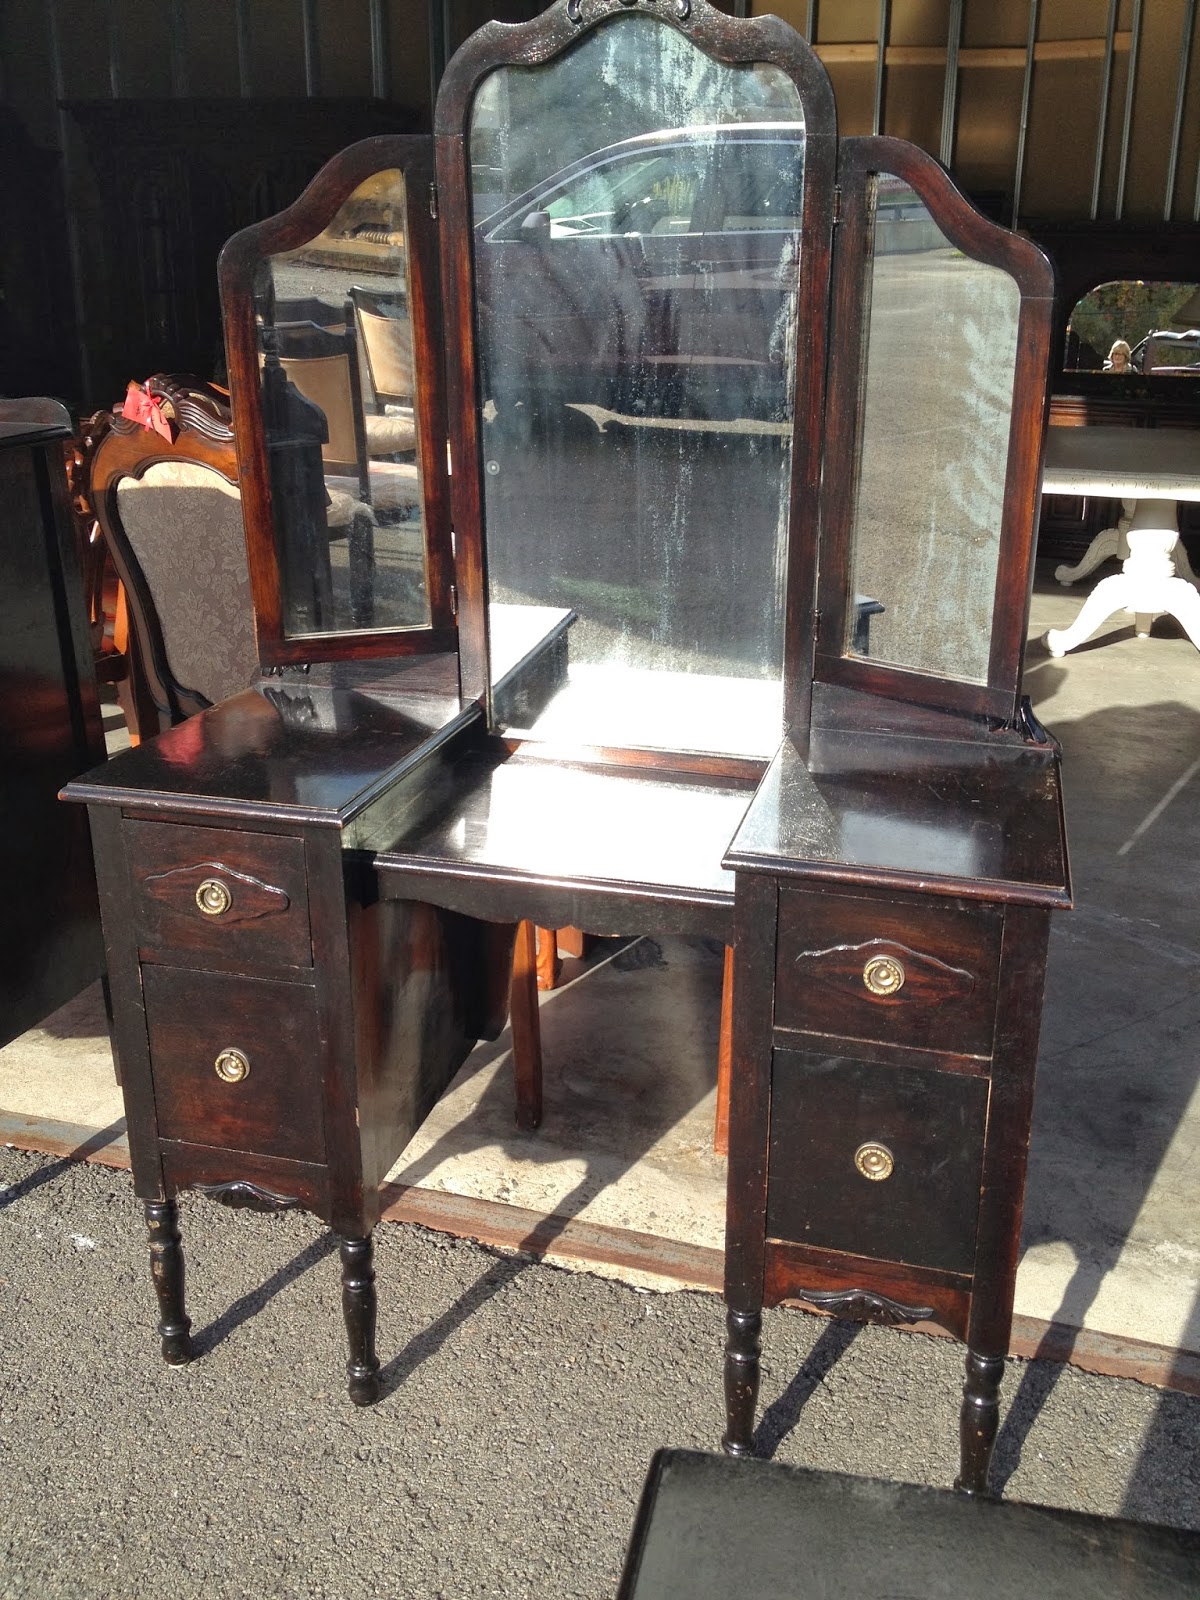
Purchased two dressers from an estate sale recently! They are made of wood (the real thing!) and they are very well fabricated but in need of a color makeover.
Turning vintage finds into unique pieces by painting them can be so much fun. Color inpiration can come from a painting, dish or fabric. I've used used three colors for this project. Cherry, Darker Cherry and Slate. Following steps I used below board.

1. Used 150 sandpaper to lightly sand all areas that will be painted. Washed with T.S.P all purpose heavy duty cleaner, diluted in water, to clean the surface area. Rinsed well with water. ( Please use protective gloves for this procedure. Follow the manufacturer's instructions on the box.)
2. Painted all over with Behr's latex mat finish including hardware, slate color and (prepare chalk paint) plaster of Paris which I added to the paint, it's easier to distress the finish after. The ratio I used: two tablespoons Plaster of Paris plus two tablespoons of water (same ratio) mix well Add to one cup of paint, mix well again and again.
3. Painted tops and bottoms of dressers with two coats of light cherry, air dried completly. Then dry brushed dark cherry over the light cherry.
4. Creating a charming antique finish is always exciting, chipped away with a small paint scraper and sandpaper letting parts of paint layers peek through. I finished with two coats of a mat latex varnish all over including the hardware.
Join me on Facebook, https://www.facebook.com/suzannedufaultdesign where we can exchange ideas and I could answer any questions you may have regarding this post. Thanks for stopping by and hope this will inspire you!!!!! Have a nice day and happy painting! Suzanne

Before, sand and wash

Painted in slate color
and chalk paint recipe (blog)

Painted top and bottom cherry color

Sanded for patina effect, paint layers peak through

Lightly brushed hardware with antique white

Dry brushed top with darker cherry of light cherry
let air dry then sanded over to add aged patina effect

Furniture came with protective glass

There we go...
and hope this will inspire you to decorate your home without breaking the bank!
Tuesday 29 October 2013
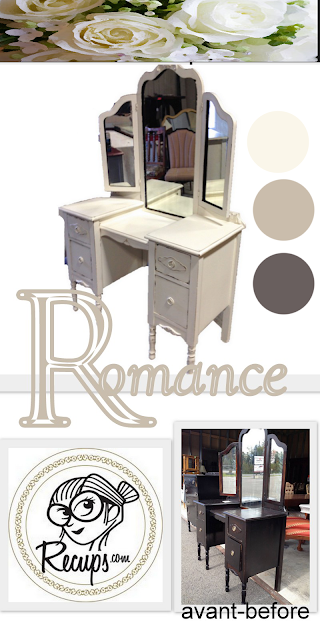
Makeup vanity paint revamp!
Hi guys,
Just finished a paint project for my customer that wanted a makeup vanity. I've painted a beautiful armoire for her link in a previous post and now she was looking for a makeup vanity.
My paint method previous post link
Paint purchased at Home Depot: Behr premium, fisnish mat
Darker color beige: base 1754
Antique white color: base 1750
Special thanks to Mélanie Desmarais from Home Depot who is always so gracious, and helpful!!!
So here we go! Have a great day

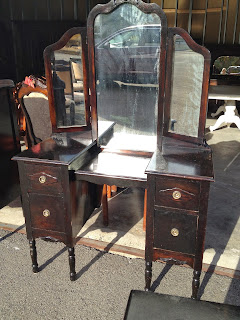
before, 1930

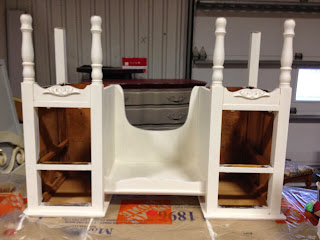
1. paint dark color, 2 paint light color

paint furniture upside down (easier to paint buttom part)

distress by sanding, darker beige and natural wood peak through

painted stencil detail

voilà!
Friday 18 October 2013
Softer before and after
Hello guys,
just finished a bedroom set, headboard, and two dressers, one of the dressers was posted on my blog just before this one!
Steps I followed:1. Used 150 sandpaper to lightly sand all areas that will be painted.
Washed with T.S.P all purpose heavy duty cleaner, diluted in water, to clean the surface area. Rinsed well with water. ( Please use protective gloves for this procedure. Follow the manufacturer's instructions on the box.)
2. Painted with Behr's latex mat finish, light greige color and plaster of Paris which I added to the paint, it's easier to distress the finish after. The ratio I used: two tablespoons Plaster of Paris plus two tablespoons of water (same ratio) mix well Add to one cup of paint, mix well again and again.
3. Finished Painting with the old rose as you can see in the photos on my board. Hardware was not removed so was painted over.
4. Creating a charming country finish was lots of fun, chipped away with a small paint scraper and sandpaper letting parts of the original dark oak and green paint peek through. I finished with two coats of a mat latex varnish all over including the hardware.
Join me on Facebook, https://www.facebook.com/suzannedufaultdesign where we can exchange ideas and I could answer any questions you may have regarding this post. Thanks for stopping by and hope this will inspire you!!!!! Have agreat one! Suzanne xxoo


Thursday 17 October 2013
1930's dresser makeover!
Sofer and prettier view!

Vintage dark wood dresser receives a new soft new look. Painted light grey and a warm pink, gently distressed with some worn edges.

Monday 30 September 2013
Imperfection love! Before and After Makeover

Steps I followed:
1. Used 150 sandpaper to scratch all areas that will be painted.
2. Washed with T.S.P all purpose heavy duty cleaner, diluted in water, to clean the surface area. Rinsed well with water. ( Please use protective gloves for this procedure. Follow the manufacturer's instructions on the box.)
3. Painted with Behr's latex mat finish, antique white and I added plaster of Paris to the paint, it's easier to distress the finish after. The ratio I used: two tablespoons Plaster of Paris plus two tablespoons of water (same ratio) mix well Add to one cup of paint, mix well again and again
4. Painted in a criss cross pattern overlapping strokes this will ad texture to the finish. Hardware was not removed so was painted over in the same color antique white.
5. Creating a charming country finish was lots of fun, chipped away with a small paint scraper and sandpaper letting parts of the original dark oak and green paint peak through. Passed the scraper over the paint...this technique created fine grey lines ( decorative finish happens because I used plaster in the paint). I finished with two coats of a mat latex varnish all over including hardware.
Please like my facebook page https://www.facebook.com/suzannedufaultdesign where we could exchange ideas and I could answers questions you may have. Thanks for stopping by and hope this will inspire you!!!!! Have agreat one! Suzanne xxoo


Scratched surface gently with paint scraper

Did not remorve hardware, painted directly for better effect

Painted over original hardware

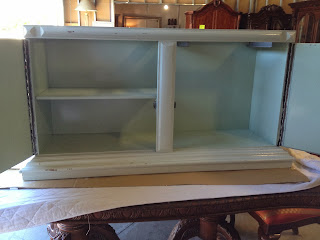
Interior cabinet before
Wednesday 4 September 2013
Little Girly & Spunky Princess!
Hi Guys,
Just finished painting furniture for a ''girly & spunky'' little princess. I think the color combo of lavender and pink turned out pretty charming!
More pieces to follow just wanted to give you a sneak peak today.
Top: painted a very loose plaid faux finish with latex paint in lavender an pink
Body: painted latex mat finish, lavender color + antique wash in a soft cream color.
A princess needs a little bling.. Five faux diamonds purchased at Micheals where added to the four corners of the drawer and above the handle.
Finish: latex varnish.
Thanks for stopping by and have a great one!!!!!!! Suzanne


I prefer to start painting with the piece upside down!
Little feet are easier to paint...

Added some bling!

Top painted plaid faux finish in pink and lavendar
I like to add two tablespoons Paris Plaster diluted with two tablespoons of water (mix well together no lumps) then added to one cup of latex paint. This procedure help me in the sanding for the distress look.
Saturday 24 August 2013
Ballerina Pink Armoire, before and after
Hi guys,
Hope you had a fun summer!
Mine was very busy with several paint projects. One of my customer's was looking for extra storage for her little girl's bedroom. Well when I saw this beauty I knew it would be lots of work but it would be worth it... There was missing a drawer so I asked my cabinet maker to make one. Created a plaid faux finish on the upper part of the cabinet front and side. I have many more projects on the way so that's all for now... Have a great one!!!!!!!
Love Suzanne!


Friday 9 August 2013
Fun And Creative Paint Ideas For Your Walls
Your walls feel sad when they’re bare, so get inspired and start painting with BEHR!Their line of BEHR Premium Plus Ultra® Interior Paint comes in hundreds of designer-inspired colors, so your walls will never feel lonely....read more by following the link.... buzzfeed Let me inspire you! Suzanne


Saturday 3 August 2013
Coffee table with vintage blue attitude!
Hello Everyone,


Just finished painting a cute end table for my customer's living room, see below. She wanted it painted fresh and in a fun color.
I've selected some photos of rooms from BHG as inspiration for the color that I would paint the table.
source: BHG


Steps I followed:
- Wash and sand
- 1st coat = 1 cup of light grey latex paint + (2 tablespoons Paris Plaster + 2 tablespoons of water mix together, then add to the grey paint ), mix very well.
- 2nd coat, same procedure as above but with a different color, in this case a darker teal blue
- Top finish with dry brush stroke in a light teal blue.
- Let dry overnight.
- Distress by sanding lightly....try to get all coats to peak trough in different spots from top to buttom.
Hope this will inspire you to try a paint project of your own! Don't hesitate if you have questions it will be a pleasure to assist you.Thanks for stopping by and have a great one! Suzanne


First coat of grey with Paris Plaster (recipe above)

Before and after .....Second coat painted blue, dry, sand, varnish

Before and after
Wednesday 31 July 2013
Armoire receives a pretty makeover!
Hello everyone,
Many projects came my way this summer!
Here's my latest paint projects for one of my customer's. I must say this was a big undertaking. It was completely painted inside and out!
In order to create an antique french look here are the steps I followed:

 STEP UNDERCOAT Created a chalk paint formula = 2 tablesp. Paris Plaster + 2 tablesp water, mix well together (no lumps) then add to 1 cup of latex paint, eggshell finish. Used paint color called Papier de Soie (light beige) from Sico.


 STEP GLAZE, added antique white latex paint to the glaze... followed instructions on the label on the can. Used Faux Glaze purchased at Home Depot Montreal.
STEP DISTRESS: Sanded the edges with a medium grit #120 sand paper. Finished with a light sand paper to smooth edges.
STEP DRY: I let painted pieces cure for about 5 days before handing them over to the customers for transport.
Voilà!!! Don't hesitate if you have questions it will always be a pleasure to assist you.
Take care, love Suzanne
Many projects came my way this summer!
Here's my latest paint projects for one of my customer's. I must say this was a big undertaking. It was completely painted inside and out!
In order to create an antique french look here are the steps I followed:


undercoat color papier de soie Sico


STEP DISTRESS: Sanded the edges with a medium grit #120 sand paper. Finished with a light sand paper to smooth edges.
STEP DRY: I let painted pieces cure for about 5 days before handing them over to the customers for transport.
Voilà!!! Don't hesitate if you have questions it will always be a pleasure to assist you.
Take care, love Suzanne
Subscribe to:
Posts (Atom)