
''Love grows better in little houses'' Doug Stone
Welcome to Pin

Wednesday 30 April 2014
Wednesday 23 April 2014
Relooker un mobilier 1980 avec de la peinture!
''Hello Everyone love your visit…this blog was written in french…since I'm from the Montréal area, in our beautiful Québec, Canada. So for my english friends I've added google translate and please do not hesitate to communicate with me if you have any questions or comments! Thanks for stopping by, take care! Suzanne
Bien voici un exemple…Un jeune couple, Annie et Sébastien pour qui j'avais déjà relooker deux tables sont venus me visiter à mon entrepôt de meubles de St-Janvier pour sélectionner un mobilier de chambre des années 80. Il était en bois blanchi qui était la grande mode de cette période.
Pour réussir de jolies associations sans se tromper, ils m'ont fournit les détails du colori dans le style Cap Cod pour leur chambre à coucher. Donc ensemble nous avons élu un faux fini parchemin de couleur blanc antique de Behr ''Nude'' W-F-210 pour la peinture.

Afin de réaliser la vision de mes clients pour la finition de ces meubles voici les étapes que j'ai suivi:
TECHNIQUES
Crée une patine usée n'est rien de compliqué mais il existe plusieurs techniques, je vous en démontre une:
1. La Préparation

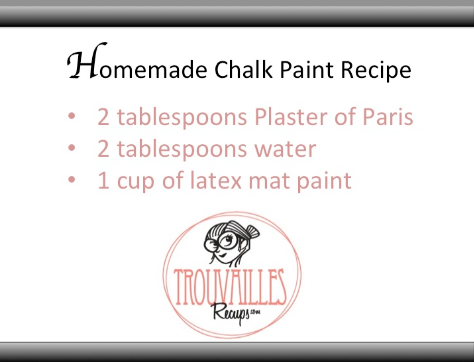
2. Peinture de craie recette maisonJe sauve du temps et des économies en utilisant cette recette de peinture de craie maison que j’ai utilisé depuis plus d’un an. Je suis vraiment satisfaite des résultats. Cette recette fourni une patine comme les meubles anciens qui accumulent plusieurs couches de couleurs. Lorsqu’ils s’usent ou subissent des chocs, des éclats apparaissent ici et là, révélant les couleurs dessous. La patine double reprend ce même principe.
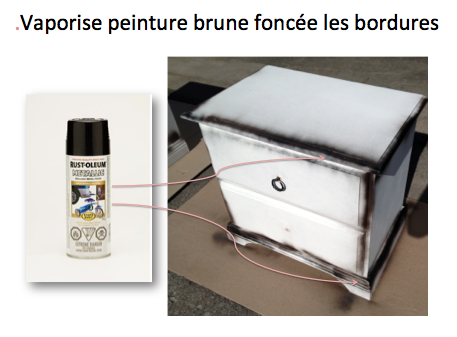
Pour créer un look antique vieillit par le temps, je peints les bordures des meubles brun foncé avec une peinture en aréosol de la marque Rust-Oleum.


Je peint les bordures brun foncé avec la peinture de craie maison couleur ''Nude''…. suivant mes photos du avant. Je laisse séché une heure et par la suite je sable ou j'avais peint brun foncé.


5. Faux finis parchemin...Peinture appliquée au pinceau sèche
Je peins les bordures brunes foncées avec la peinture de craie maison couleur ''Nude''…. suivant mes photos du avant. Je laisse sécher une heure et par la suite je ponce légèrement. Je peins en blanc légèrement avec un pinceau sèche par dessus le blanc cassé ''Nude''…je sable pour donner un finition usée.
6. Protéger la patine, le vernis
J'utilise la vernis Saman latex, fini mat. J'applique deux à trois couches sur le dessus avec un pinceau de deux pouces. Le corps j'applique une à deux couche dépendant de l'utilité. IL est important de laissé sécher au moins une heure entre les couche de poncer avec un papier sablé très fin.
N'hésite pas de communiquer avec moi si tu as des questions ou commentaires ce sera un grand plaisir de t'assiter! Bonne journée et on lâche pas! Suzanne

Sauriez-vous comment faire une métamorphose de vos meubles 1980?
Bien voici un exemple…Un jeune couple, Annie et Sébastien pour qui j'avais déjà relooker deux tables sont venus me visiter à mon entrepôt de meubles de St-Janvier pour sélectionner un mobilier de chambre des années 80. Il était en bois blanchi qui était la grande mode de cette période.
Pour réussir de jolies associations sans se tromper, ils m'ont fournit les détails du colori dans le style Cap Cod pour leur chambre à coucher. Donc ensemble nous avons élu un faux fini parchemin de couleur blanc antique de Behr ''Nude'' W-F-210 pour la peinture.
Afin de réaliser la vision de mes clients pour la finition de ces meubles voici les étapes que j'ai suivi:
TECHNIQUES
Crée une patine usée n'est rien de compliqué mais il existe plusieurs techniques, je vous en démontre une:
1. La Préparation
Cette étape est indispensable pour la réalisation de mes projets! Losque je travaille sur un meuble, je commence par lui ôter sa protection en le sablant légèrement avec un papier à sabler grade 150, afin que les étapes qui suivent accrochent sur les parois. Que votre parois soit vernis, huilé ou ciré, il existe une tehnique rapide, économique qui évite de poncer le support, ce qui génère beaucoup de poussière, ou de le décaper. Généralement je commence par tourner le meuble à l’envers sur sa tête, je procède à laver le dessous du meuble… Il est étonnant de voir ce qu’on peut trouver dessous haha!…Je lave le tout avec le produit TSP. Il faut enlever la poussière et la graisse dans les moindres recoins. (si vous utilisez ce produit suivez bien les instructions indiquées sur la boîte).
Fourniture pour nettoyer
- Une éponge abrassive
- TSP + gants de protection
- Un seau, des guénilles blanches (ne détaignent pas)
2. Peinture de craie recette maisonJe sauve du temps et des économies en utilisant cette recette de peinture de craie maison que j’ai utilisé depuis plus d’un an. Je suis vraiment satisfaite des résultats. Cette recette fourni une patine comme les meubles anciens qui accumulent plusieurs couches de couleurs. Lorsqu’ils s’usent ou subissent des chocs, des éclats apparaissent ici et là, révélant les couleurs dessous. La patine double reprend ce même principe.
a) je transverse la quantité de peinture dans un contenant b) je mélange bien l’eau et le plâtre dans un autre contenant c) j’incorpore le mélange de plâtre dans la peinture. Je brasse régulièrement cette recette pendant que je peinture pour le garder homogène. J’achète chez Home Dépôt la marque Behr, Premium Plus Ultra peinture & Apprêt, fini mat disponible en gallon ou pinte.D) la première couche séche pendant deux heures, je ponce avec un papier fin pour enlever le petits grumeaux…Je donne une deuxième couche…Je ponce encore avec le papier à sabler fin.
3. Première patine peinture bordurePour créer un look antique vieillit par le temps, je peints les bordures des meubles brun foncé avec une peinture en aréosol de la marque Rust-Oleum.
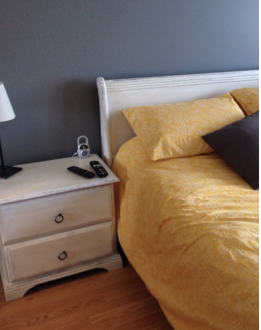
Table de chevet peint bordures brun foncé avec Rust-Oleum
Commode
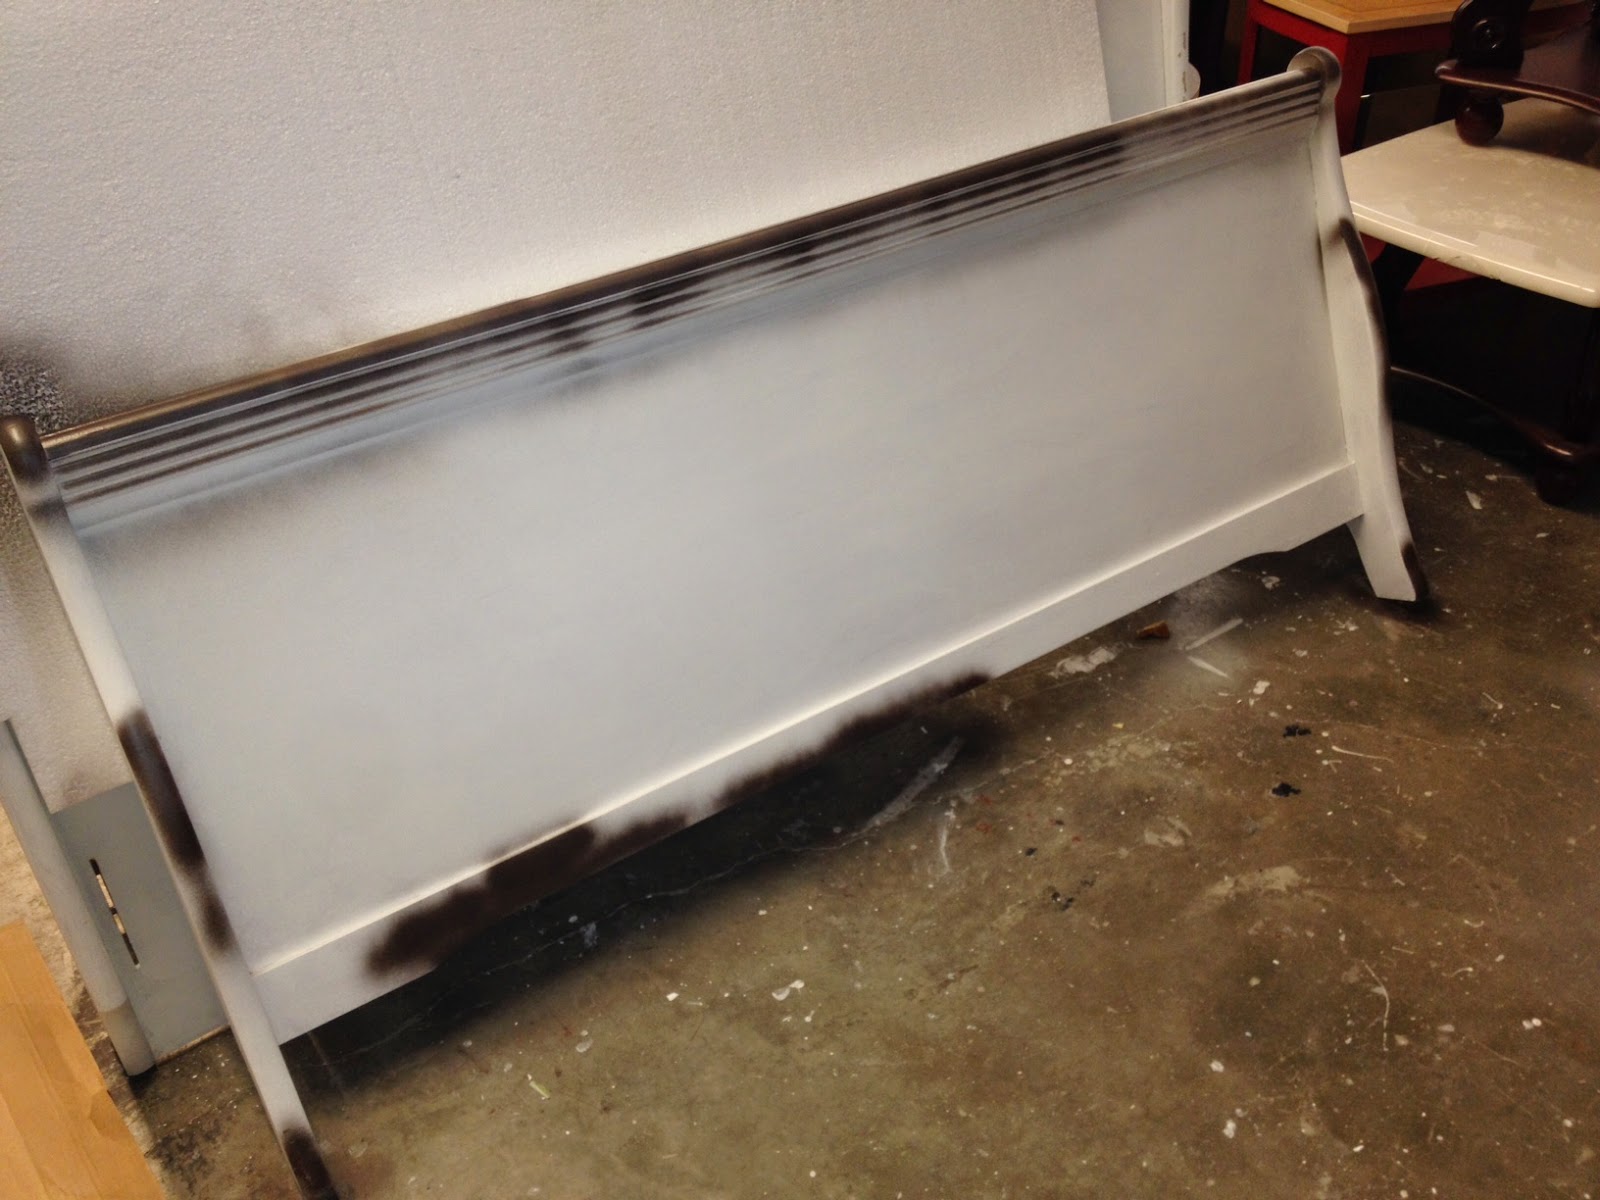
Pied de lit
Tête de lit
4. Deuxième Patine, peint craie maison couleur ''Nude'' Je peint les bordures brun foncé avec la peinture de craie maison couleur ''Nude''…. suivant mes photos du avant. Je laisse séché une heure et par la suite je sable ou j'avais peint brun foncé.
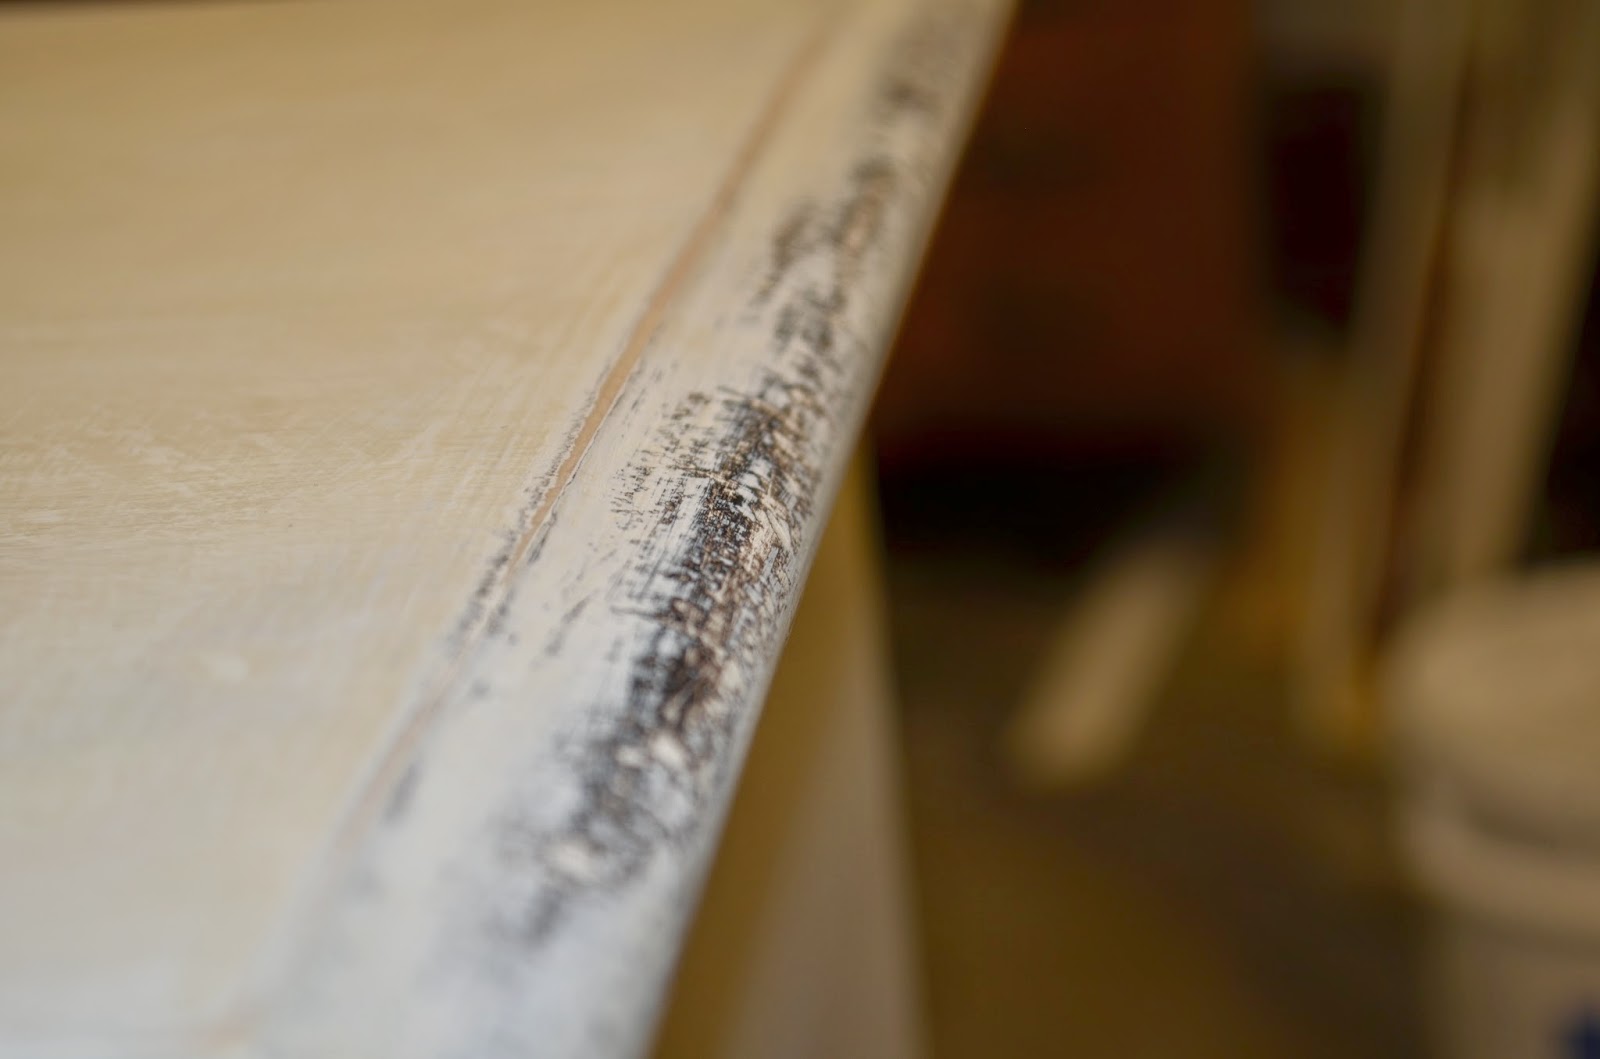
Création de la patine…au fils des années, les meubles sont repeints et accumulent plusieurs couches de couleurs.
Bordures usées aller retour avec un papier sablé…on se met en forme haha!
table de chevet presque fini…Une couche de vernis latex mat pour une bonne protection
Je peins les bordures brunes foncées avec la peinture de craie maison couleur ''Nude''…. suivant mes photos du avant. Je laisse sécher une heure et par la suite je ponce légèrement. Je peins en blanc légèrement avec un pinceau sèche par dessus le blanc cassé ''Nude''…je sable pour donner un finition usée.
6. Protéger la patine, le vernis
J'utilise la vernis Saman latex, fini mat. J'applique deux à trois couches sur le dessus avec un pinceau de deux pouces. Le corps j'applique une à deux couche dépendant de l'utilité. IL est important de laissé sécher au moins une heure entre les couche de poncer avec un papier sablé très fin.
N'hésite pas de communiquer avec moi si tu as des questions ou commentaires ce sera un grand plaisir de t'assiter! Bonne journée et on lâche pas! Suzanne
Bon repos!
Friday 27 December 2013
Please join me at my new web site recups.com
Hi Guys,
I've moved this blog to my new web site recups.com,
Hope you will join me! Thanks xxoohttp://recups.com
Saturday 16 November 2013
Painting furniture with cherry and slate colors!
Hello Everyone!
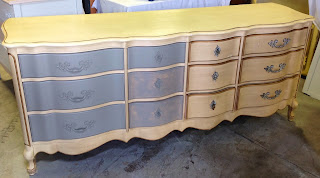
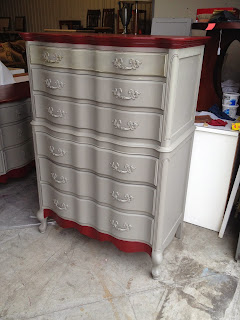
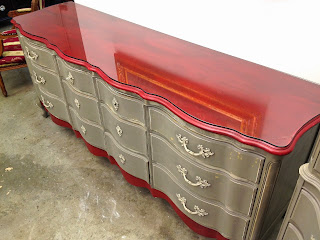
Purchased two dressers from an estate sale recently! They are made of wood (the real thing!) and they are very well fabricated but in need of a color makeover.
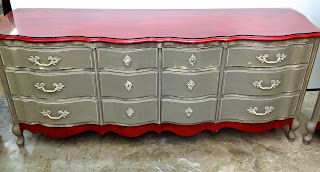
Turning vintage finds into unique pieces by painting them can be so much fun. Color inpiration can come from a painting, dish or fabric. I've used used three colors for this project. Cherry, Darker Cherry and Slate. Following steps I used below board.

1. Used 150 sandpaper to lightly sand all areas that will be painted. Washed with T.S.P all purpose heavy duty cleaner, diluted in water, to clean the surface area. Rinsed well with water. ( Please use protective gloves for this procedure. Follow the manufacturer's instructions on the box.)
2. Painted all over with Behr's latex mat finish including hardware, slate color and (prepare chalk paint) plaster of Paris which I added to the paint, it's easier to distress the finish after. The ratio I used: two tablespoons Plaster of Paris plus two tablespoons of water (same ratio) mix well Add to one cup of paint, mix well again and again.
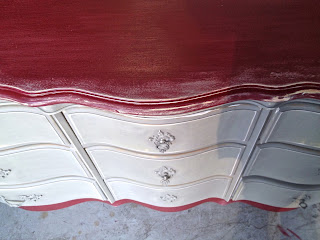
3. Painted tops and bottoms of dressers with two coats of light cherry, air dried completly. Then dry brushed dark cherry over the light cherry.
4. Creating a charming antique finish is always exciting, chipped away with a small paint scraper and sandpaper letting parts of paint layers peek through. I finished with two coats of a mat latex varnish all over including the hardware.


Purchased two dressers from an estate sale recently! They are made of wood (the real thing!) and they are very well fabricated but in need of a color makeover.
Turning vintage finds into unique pieces by painting them can be so much fun. Color inpiration can come from a painting, dish or fabric. I've used used three colors for this project. Cherry, Darker Cherry and Slate. Following steps I used below board.

1. Used 150 sandpaper to lightly sand all areas that will be painted. Washed with T.S.P all purpose heavy duty cleaner, diluted in water, to clean the surface area. Rinsed well with water. ( Please use protective gloves for this procedure. Follow the manufacturer's instructions on the box.)
2. Painted all over with Behr's latex mat finish including hardware, slate color and (prepare chalk paint) plaster of Paris which I added to the paint, it's easier to distress the finish after. The ratio I used: two tablespoons Plaster of Paris plus two tablespoons of water (same ratio) mix well Add to one cup of paint, mix well again and again.
3. Painted tops and bottoms of dressers with two coats of light cherry, air dried completly. Then dry brushed dark cherry over the light cherry.
4. Creating a charming antique finish is always exciting, chipped away with a small paint scraper and sandpaper letting parts of paint layers peek through. I finished with two coats of a mat latex varnish all over including the hardware.
Join me on Facebook, https://www.facebook.com/suzannedufaultdesign where we can exchange ideas and I could answer any questions you may have regarding this post. Thanks for stopping by and hope this will inspire you!!!!! Have a nice day and happy painting! Suzanne

Before, sand and wash

Painted in slate color
and chalk paint recipe (blog)

Painted top and bottom cherry color

Sanded for patina effect, paint layers peak through

Lightly brushed hardware with antique white

Dry brushed top with darker cherry of light cherry
let air dry then sanded over to add aged patina effect

Furniture came with protective glass

There we go...
and hope this will inspire you to decorate your home without breaking the bank!
Tuesday 29 October 2013
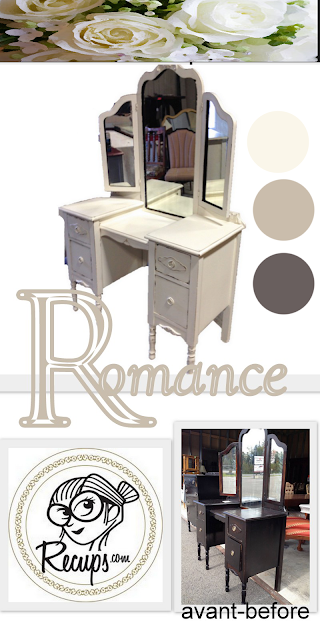
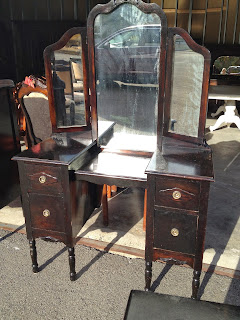
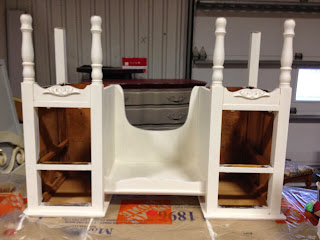
Makeup vanity paint revamp!
Hi guys,
Just finished a paint project for my customer that wanted a makeup vanity. I've painted a beautiful armoire for her link in a previous post and now she was looking for a makeup vanity.
My paint method previous post link
Paint purchased at Home Depot: Behr premium, fisnish mat
Darker color beige: base 1754
Antique white color: base 1750
Special thanks to Mélanie Desmarais from Home Depot who is always so gracious, and helpful!!!
So here we go! Have a great day

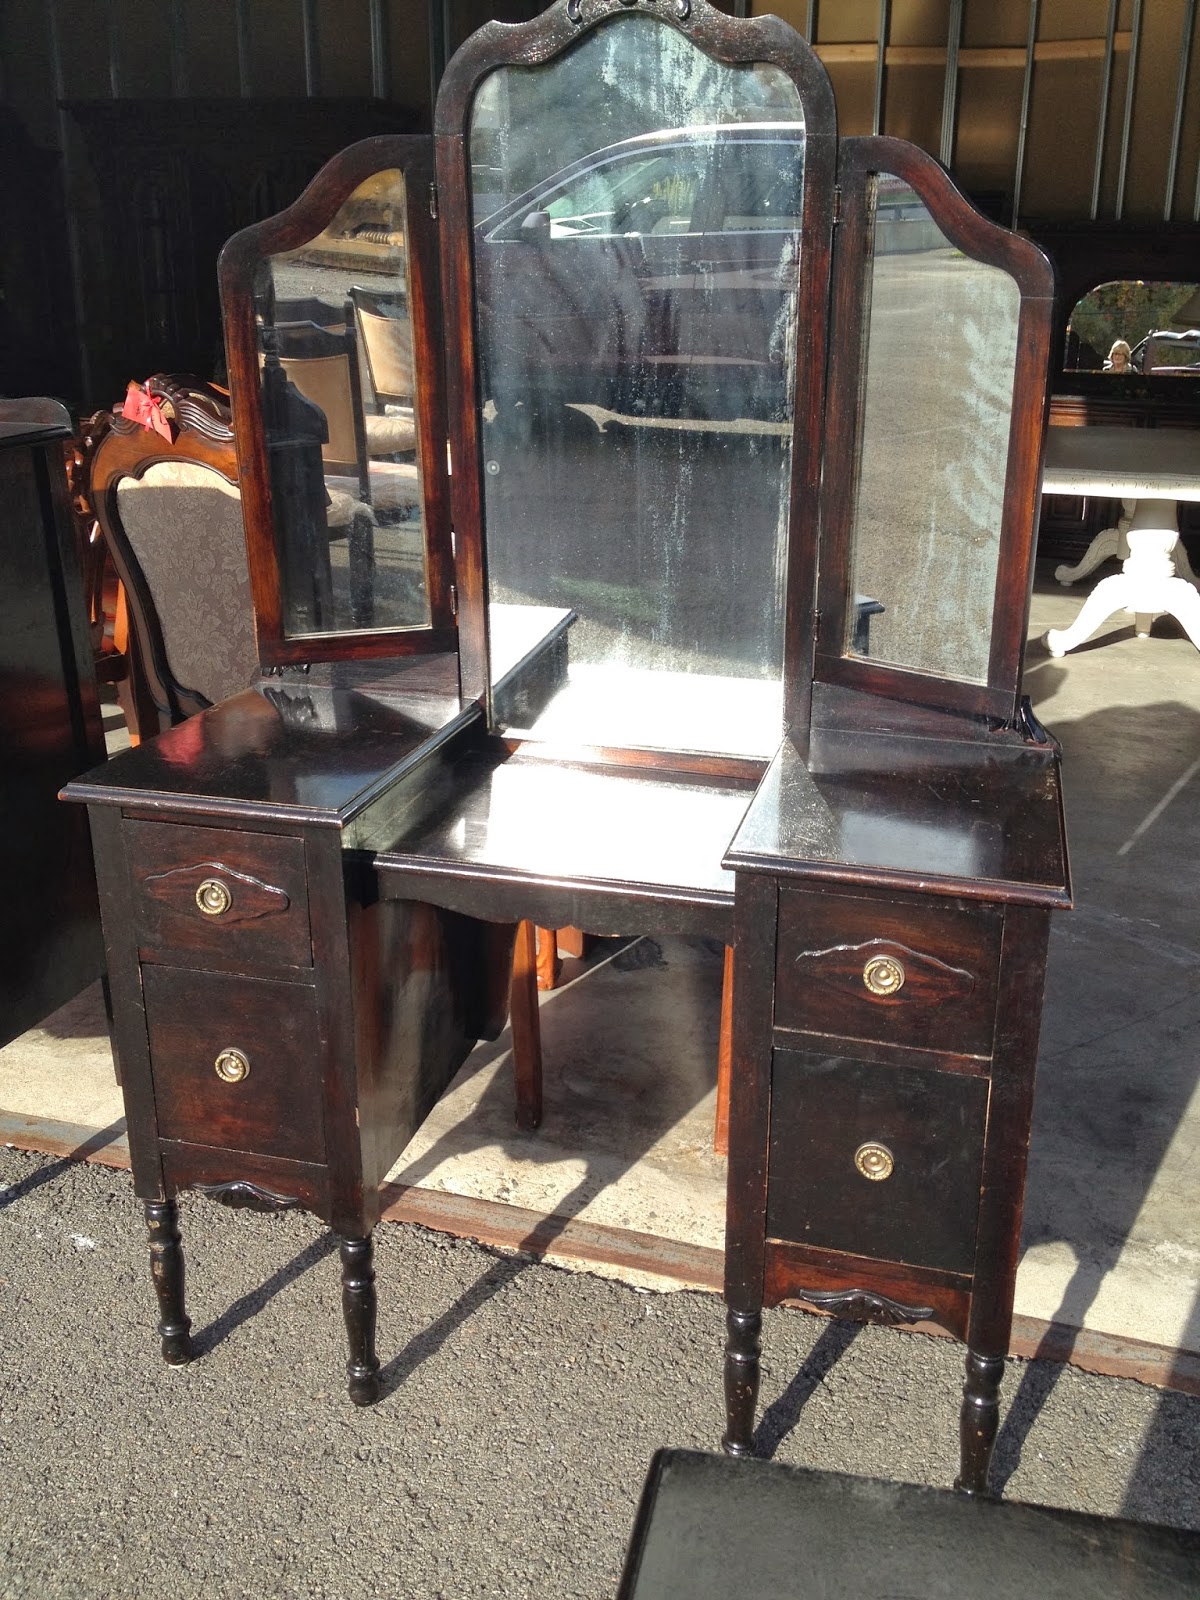
before, 1930

1. paint dark color, 2 paint light color

paint furniture upside down (easier to paint buttom part)

distress by sanding, darker beige and natural wood peak through

painted stencil detail

voilà!
Friday 18 October 2013
Softer before and after
Hello guys,
just finished a bedroom set, headboard, and two dressers, one of the dressers was posted on my blog just before this one!
Steps I followed:1. Used 150 sandpaper to lightly sand all areas that will be painted.
Washed with T.S.P all purpose heavy duty cleaner, diluted in water, to clean the surface area. Rinsed well with water. ( Please use protective gloves for this procedure. Follow the manufacturer's instructions on the box.)
2. Painted with Behr's latex mat finish, light greige color and plaster of Paris which I added to the paint, it's easier to distress the finish after. The ratio I used: two tablespoons Plaster of Paris plus two tablespoons of water (same ratio) mix well Add to one cup of paint, mix well again and again.
3. Finished Painting with the old rose as you can see in the photos on my board. Hardware was not removed so was painted over.
4. Creating a charming country finish was lots of fun, chipped away with a small paint scraper and sandpaper letting parts of the original dark oak and green paint peek through. I finished with two coats of a mat latex varnish all over including the hardware.
Join me on Facebook, https://www.facebook.com/suzannedufaultdesign where we can exchange ideas and I could answer any questions you may have regarding this post. Thanks for stopping by and hope this will inspire you!!!!! Have agreat one! Suzanne xxoo


Thursday 17 October 2013
1930's dresser makeover!
Sofer and prettier view!

Vintage dark wood dresser receives a new soft new look. Painted light grey and a warm pink, gently distressed with some worn edges.

Subscribe to:
Posts (Atom)